Getting started
Install SelectZero
For hosting your application on your cloud instance, make sure you have a connection to docker hub.
You can find latest versions here
Deploy with docker
Pull docker image
docker pull selectzero/selectzero:2026.8.4Run container
docker run -d -v {local_path}/logs:/usr/app/logs -v {local_path}/database:/usr/app/database -v {local_path}/drivers:/usr/app/drivers -v {local_path}/reports:/usr/app/reports -v {local_path}/keys:/usr/app/keys -p 8090:8090 -e JAVA_OPTIONS='-Xmx4g' selectzero/selectzero:2026.8.4-v {local_path}/logs:/usr/app/logs
Logs storage
-v {local_path}/database:/usr/app/database
DQM local database
-v {local_path}/drivers:/usr/app/drivers
JAR connectors storage
-v {local_path}/reports:/usr/app/reports
Reports and results
-v {local_path}/keys:/usr/app/keys
Key files storage such as BigQuery JSON keys and application certificate keystore
-p 8090:8090
Port mapping for exposing DQM application at port 8090
selectzero/selectzero:2026.8.4
Image from dockerhub, latest tag is also available
Validate that DQM container is running
docker ps
First login
By default, DQM will run on port 8090: http://localhost:8090
The initial password for the admin user is written to the file
admin-init.txtin the application's working directory (/usr/app/admin-init.txtin the container — read it with e.g.docker exec <container> cat /usr/app/admin-init.txt). The application log points at this file. The file is deleted automatically after the first login:Username: admin Password: [generated password in admin-init.txt]
For more information, see configuration page.
Connect to database
Add a New Database Connection
On Connections page, click "New connection" button.
Insert database connection information:
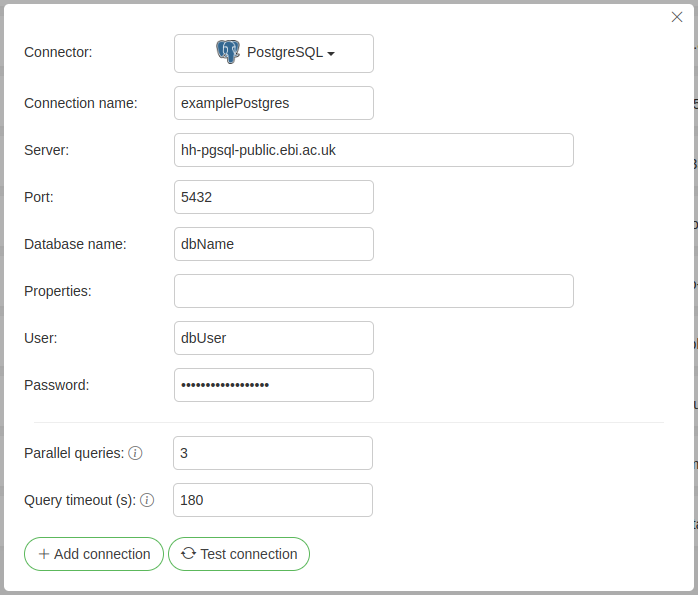
Connector – database JDBC driver (see Connector settings to add new drivers)
Connection name – custom name for the connection
Server – database server address
Port – database port
Database name – database name in server
User – database user (we recommend using a user with read-only rights) For more granular database user management, see Adding additional database users
Password – password for the user
Click "Save" button (the "Test" button next to it validates the connection first).
New connection will appear on the list, and the connection status will show if the connection was successful.
Add metadata
Open the saved connection from the list — the metadata panel is shown next to the connection's settings.
Pick schemas from the schema selector (custom schemas can be typed in and added):
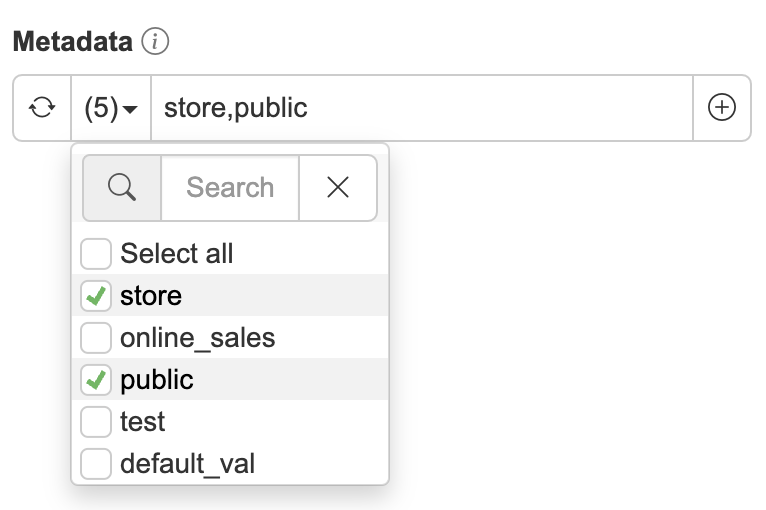
Click "Add selected" button to import the schemas
Metadata should now be available
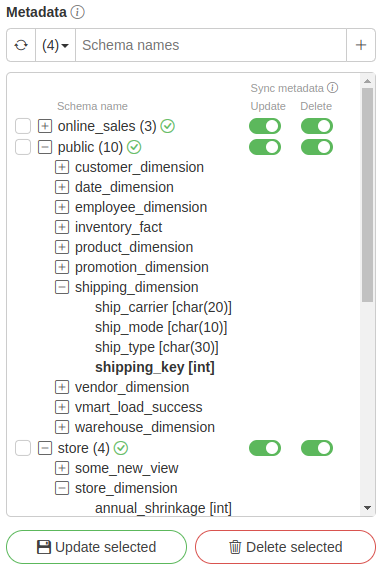
For more information, see Connections page.
Overview in data catalog
Objects page provides an overview of all database objects, allowing users to create a data catalog to manage data assets efficiently.
The Objects view can be accessed on the Catalog page under the Objects tab.
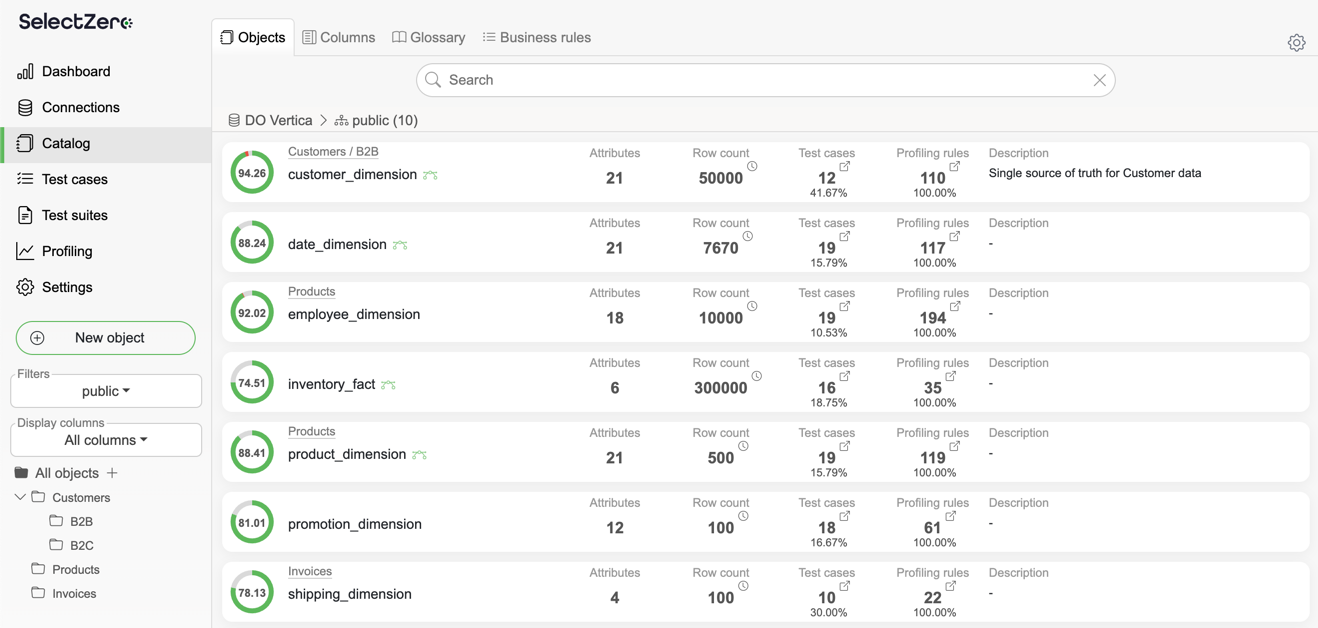
For every catalog object you can see for example its:
Quality - Data quality metric calculated based on test cases and profilings
Object - Object name in the database
Attributes - Number of attributes (columns) of the object
Test cases/Profilings - Counts of related validations
For more information, see Catalog page.
Create data validations
Click "New test case" button and select "Empty test case" (the menu also offers Standard validations, the AI Assistant and Dynamic rules)
Fill test case info:
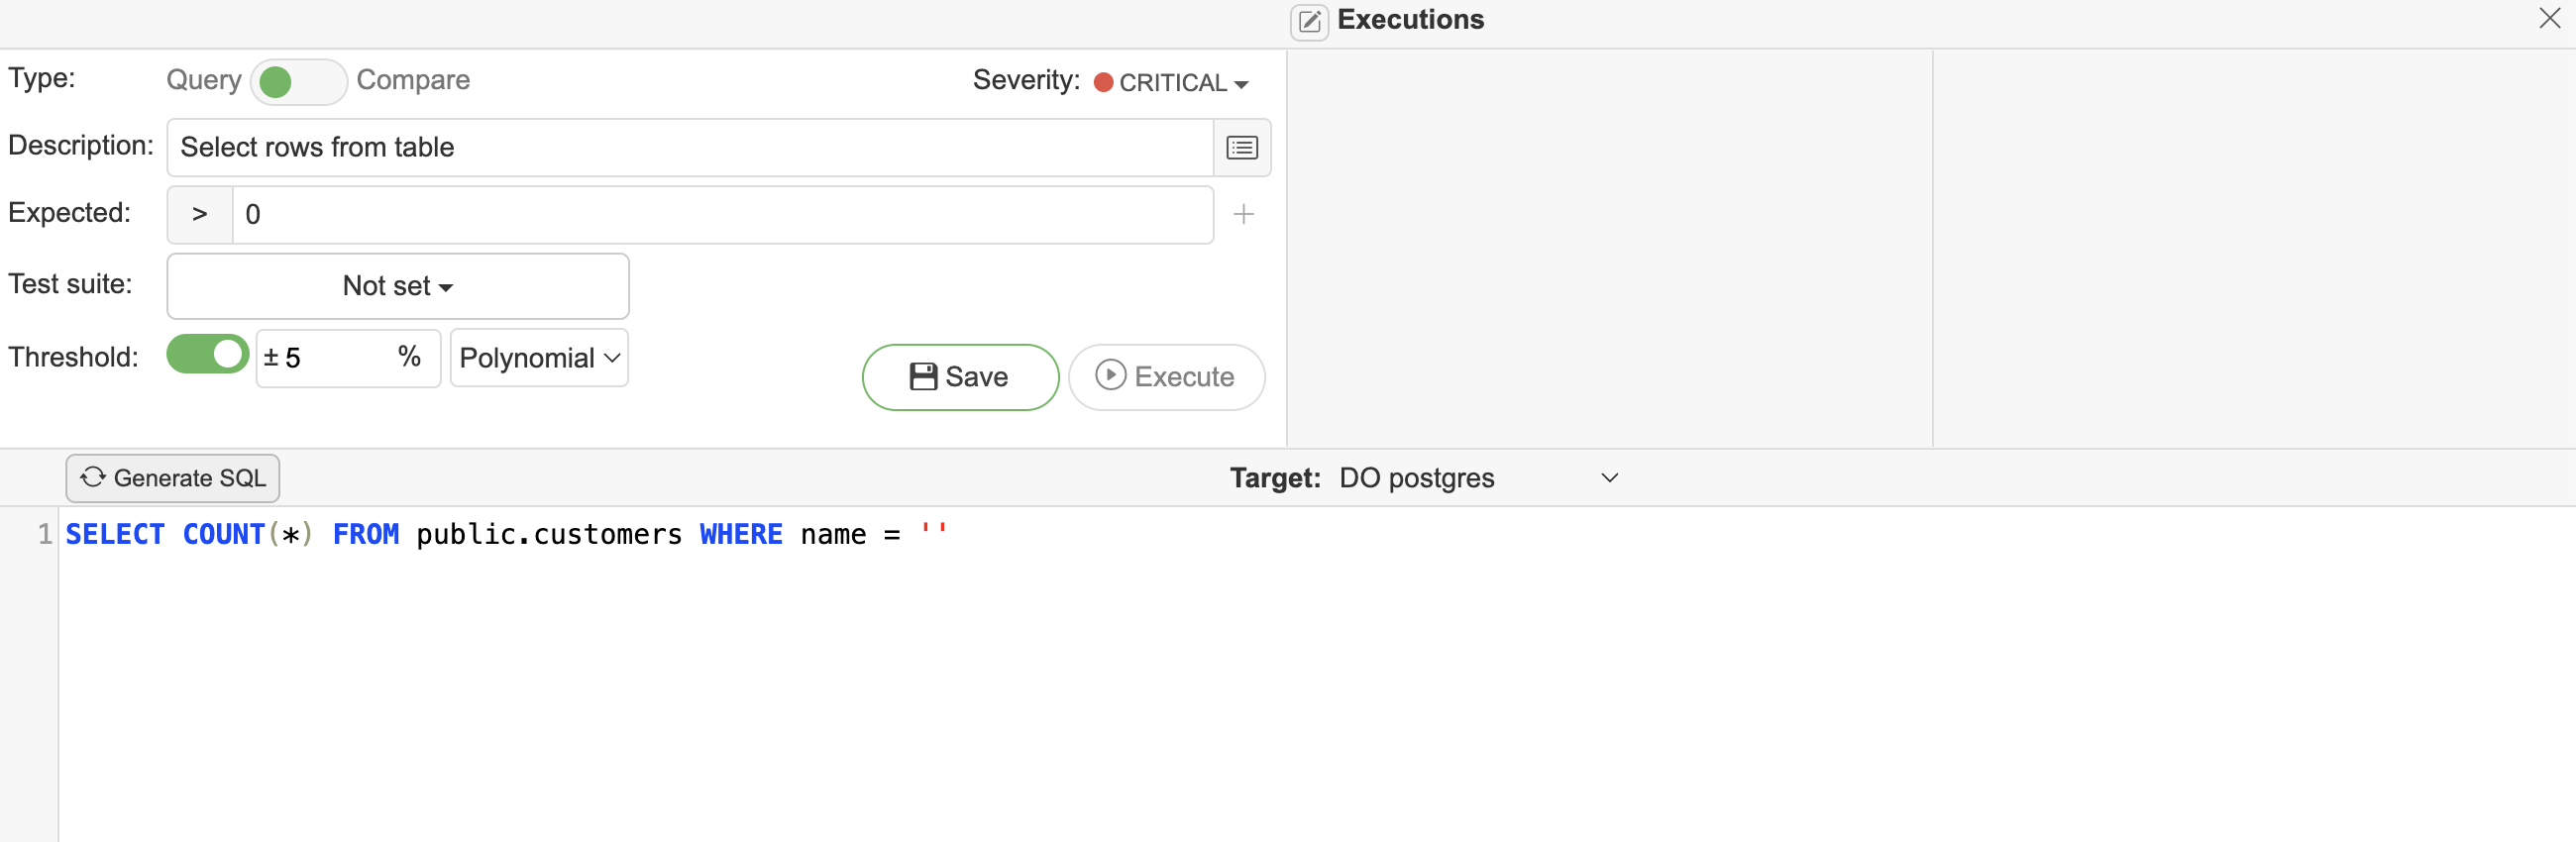
Description - Test case short description, which will be visible from list view. A longer description can be added in the Additional information field
Expected result - Test case expected results, which can be either numerical or string value. Expected result can also be combination of two conditions:

Connection - Target connection to execute the test against, selected above the SQL editor
Query window - Test case SQL Query window on the SQL tab
Click "Save" button
For more information, see test case page.
Create profilings
Profile Database Objects
Follow these steps to profile database objects.
Press "Add objects" button in the toolbar.
Filter out objects you wish to profile.
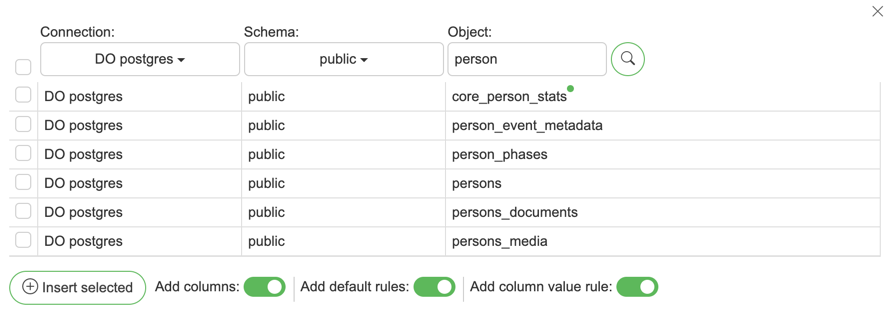
Choose objects to profile by checking the checkboxes and clicking the "Add" button.
New profiling object will now be shown on the page.
For more information, see profiling page.