Dashboard
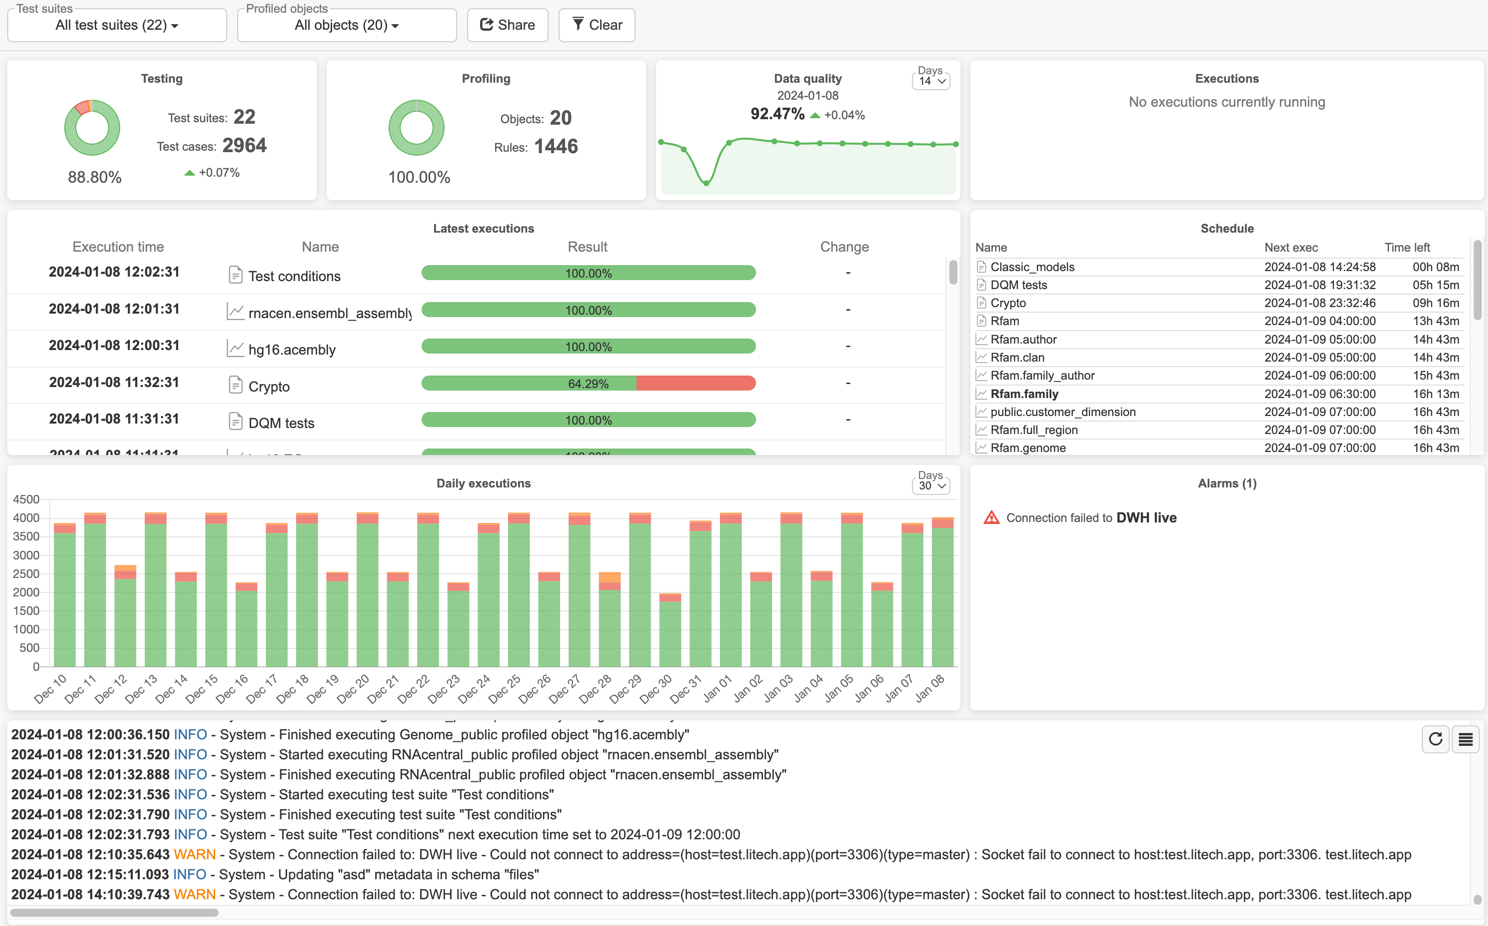
Dashboard gives an overview of current data quality based on the validations inserted into the application. A dashboard is a grid of tiles: status-based charts for selected test suites, business rules, test case reports, test cases and objects, plus panel tiles for ongoing executions, upcoming schedule and alerts.
Dashboards are switched via the dashboard selector in the toolbar - it lists the Default dashboard and every custom dashboard the user's roles have access to.
Create custom dashboard
A new dashboard is created with the New dashboard button in the dashboard toolbar. Enter a Title and select the Allowed roles that can access it - the new dashboard then opens in layout edit mode.
At least one role has to be selected, since a dashboard with no roles is visible to nobody. Administrators can always open a dashboard regardless of its roles.
Favorite dashboard
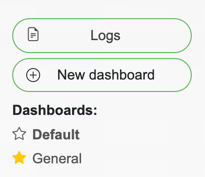
Select Favourite from the Edit menu to make the current dashboard the one preselected when navigating to the Dashboard page. The favourite is marked with a star in the dashboard selector. The choice is stored in the browser, so it is per device, not per user account.
Edit dashboard

The Edit menu in the toolbar contains:
Favourite / Unfavourite - see Favorite dashboard
Edit dashboard - opens a modal to edit the dashboard Title and Allowed roles. The modal also holds the Delete button, which removes the dashboard and its tiles (with confirmation).
Change layout - enter layout edit mode to add, move, resize and delete tiles
Create a copy - saves the current layout and duplicates the dashboard
In layout edit mode the toolbar shows:
Save - save the tile layout changes
Cancel - revert all layout and tile changes made since entering edit mode
New tile - a dropdown with the available tile kinds: Graph, Entity details, Executions, Schedule and Alerts. Graph and Entity details open the tile configuration modal; the three panel kinds are added immediately and each can be present only once per dashboard.
Edit a tile

 - opens edit mode for the selected tile
 - click and hold to drag the tile to any cell of the grid; overlapping tiles are pushed down or swapped
 - click and hold to resize the tile's width and height; tiles snap to the grid shown behind them
Pressing Escape cancels an in-progress drag or resize. Deleted tiles disappear immediately but are only removed when the layout is saved - Cancel restores them.
Graph tile
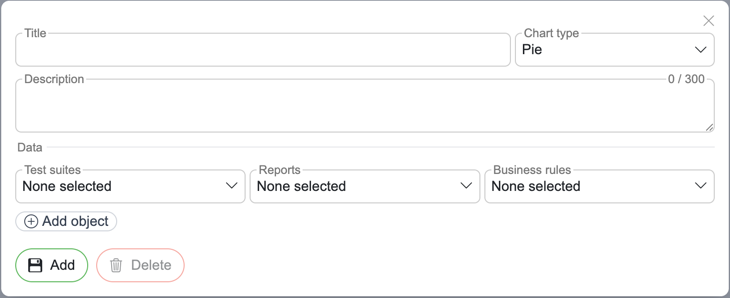
Title - tile name
Chart type - visualization type
Description - shown on the tile info tooltip
Custom fields (Bar charts only) - adds a sortable column per selected custom field
Test suites - test suites to add for tile
Reports - test case reports to add for tile
Business rules - business rules to add for tile
Test cases - test cases to add for tile
Add object - select objects based on connection and schema. The Dynamic schema (live) toggle aggregates the whole schema as one entry, listed as Whole schema (live), and automatically includes objects added to it later. For each object, the Counts dropdown chooses which data-quality results the tile counts for it: test cases & profilings (default), test cases only, or profilings only
Add / Save - create the tile, or save changes when editing (enabled once something has changed)
Delete - remove tile from the dashboard (applied when the layout is saved)
A tile's selection is capped: 50 entities on a multi line chart, 100 on a bar chart, and 200 on any tile. Exceeding a cap is refused with a message naming the limit.
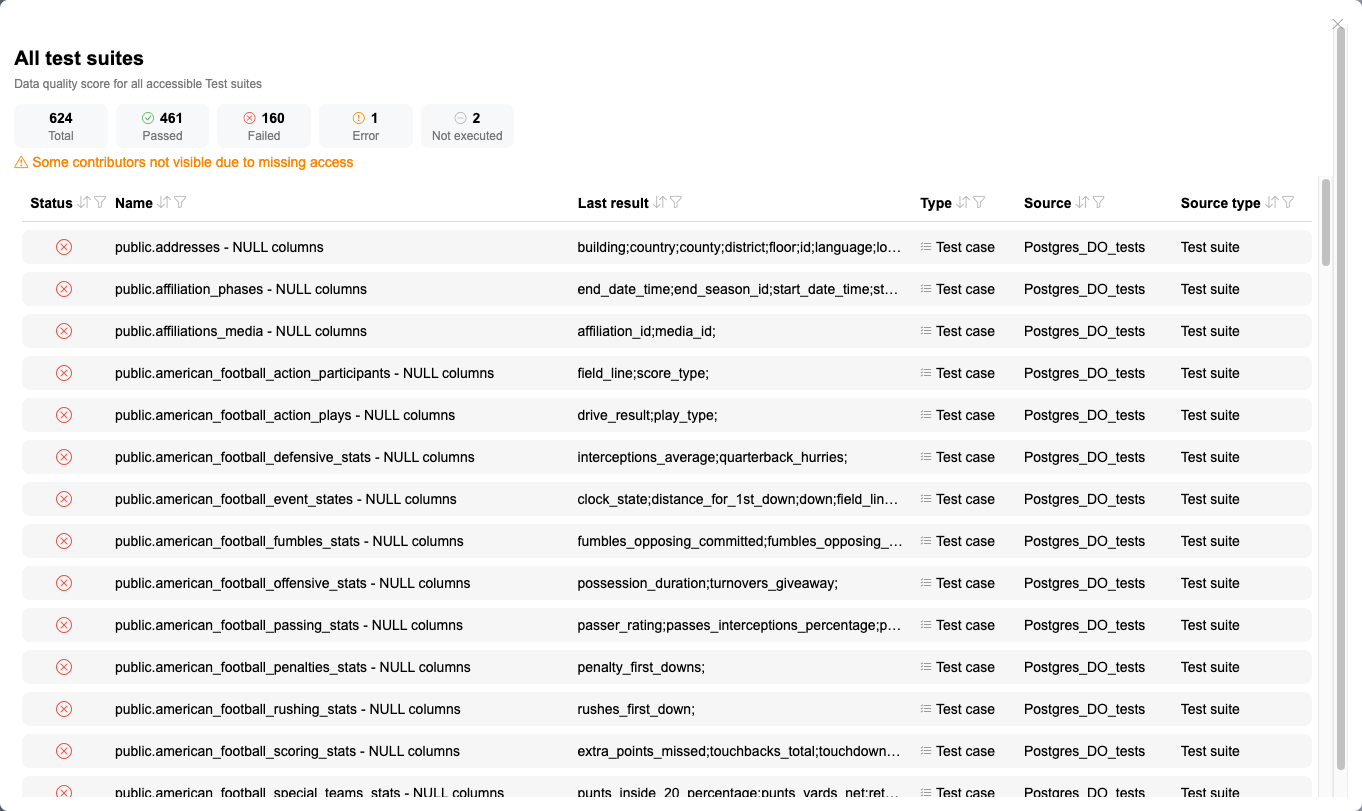
Every graph tile has a drill-down: the list icon in the tile's corner opens a modal listing all test cases and profiling rules behind the score, with their Status, Name, Type, Source, Source type and Last result. The list can be sorted and filtered, and each row navigates to its entity. When the user cannot see every contributor, the modal says so rather than silently showing a short list.
Entity details tile
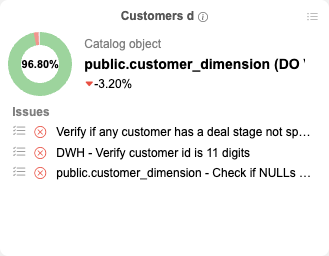
The Entity details tile shows a single entity with its quality score, the change compared to the previous day, and - for entities with children - the currently failing items. Configuring it takes an Entity type (test case, test suite, business rule, report or catalog object) and then the Entity itself.
The failing items are listed under Issues, each with its Expected result, Result and when it was Executed. Long lists are truncated, with a note of how many of the total are shown. An entity with nothing failing reports No failing items.
Supported tile types
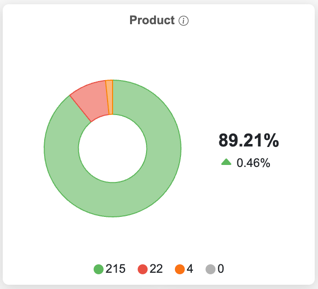

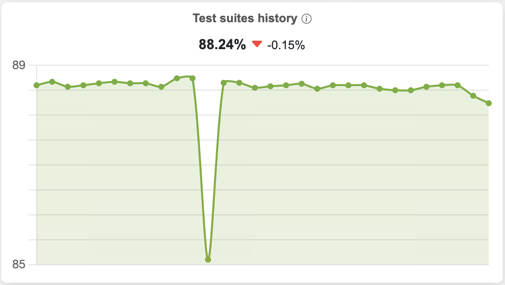
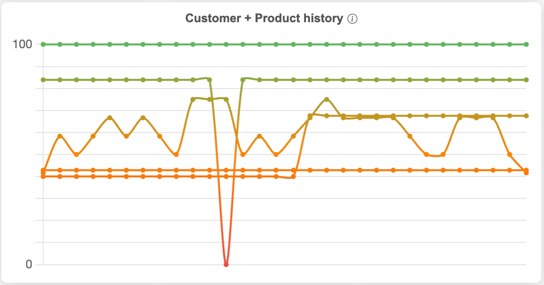
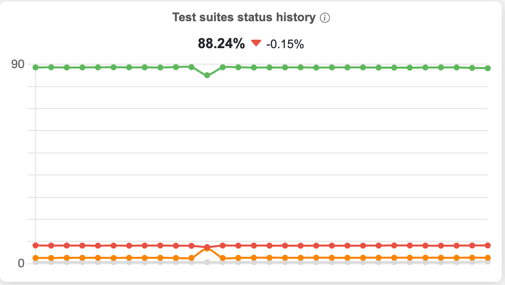
Bar charts are interactive: rows can be sorted by name, score or any custom-field column, and entity names open the entity's detailed view.
Executions
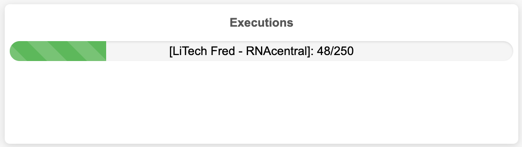
All active executions are displayed in the Executions tile. Admins can cancel an execution by clicking the X on its row - a confirmation is shown first. System-scheduled metadata syncs are hidden by default; the gear icon on the tile toggles their visibility.
Schedule
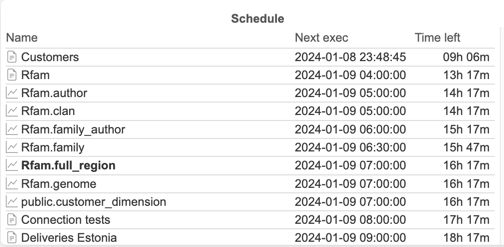
Upcoming test suite and profiling executions, listed by Name, Next exec and Time left, and ordered by how soon they trigger. A narrow tile drops the Next exec column and keeps the countdown, so widen the tile to see exact times. A row already picked up reads In queue or Executing instead of a countdown. Clicking a row opens the scheduled entity. Like Executions, the tile's gear icon controls whether system-scheduled syncs are listed.
Alerts
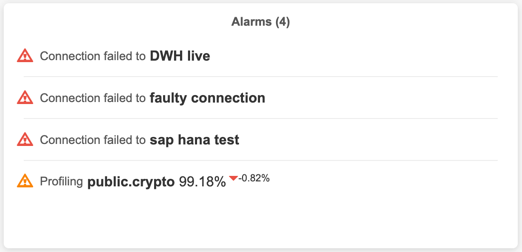
The Alerts tile has two sections. My alerts lists the current user's alert subscriptions that are currently below 100% quality, worst first. Other alerts lists alarms created for failed connections, and for test suites or profilings whose results have negatively changed compared to the previous day. Clicking a row opens the entity.
Logs
Clicking the Logs button on the right of the dashboard toolbar opens the logs modal, giving an overview of the application's user and system actions.
For full details on log types, permissions, and downloading archived logs, see Logging.