Test suites
Test suites page allows users to create and manage test suites, which are used to package test cases. Click on a test suite to:
Edit – edit test suite properties, scheduling and alerts
View test cases – open test cases page for this test suite
Execute – execute the test suite (requires user to have access to all test suite's test cases' connections)
Reports – download and view HTML reports with latest results for the test suite

Private test suites have an indicator ![]() at the end of the test suite (test suite "Connection tests" in the image)
at the end of the test suite (test suite "Connection tests" in the image)
Adding a new test suite
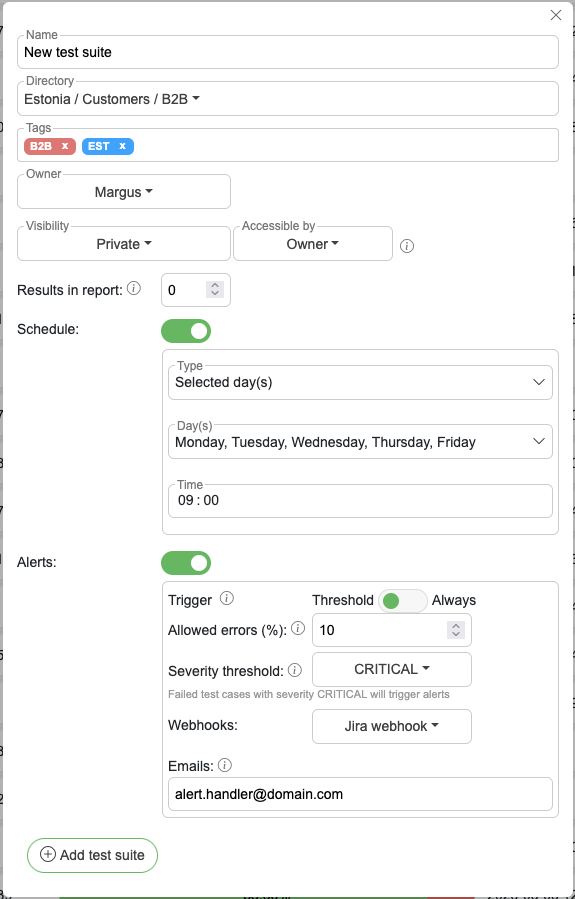
Test suite properties
Test suite name – display name for test suite
Directory – directory of the test suite
Tags – see chapter Adding tags to a test suite
Owner - who can edit this test suite
Results in report – sample results of test cases (max 1000 rows) are displayed in HTML report
Test suite visibility
Public - Accessible to all users
Private - Test suite will be visible and editable to owner and users with role(s) selected in "Editable by"
Read-Only - Test suite will be visible to everybody, but editable only by owner and users with role(s) selected in "Editable by"
Visible to - which role can see the test suite (default "Owner")
Schedule – schedule when the test suite should be executed.
Trigger - Threshold sends alerts only when the percentage of failed test cases exceeds a set limit, while Always sends alerts after every scheduled execution.
Allowed errors – % value of errors allowed. When the test failure percentage is larger than the allowed threshold, an alert will be sent (0% to send an alert if any of the tests fails)
Severity threshold - INFO, WARNING, CRITICAL. Failed test cases with the set severity or higher will trigger alerts. For example severity WARNING will trigger alerts for test cases with severity WARNING and CRITICAL.
Webhook – Webhook to which an alert is sent if error threshold is exceeded
Emails – comma separated emails to which report is sent if error threshold is exceeded
Click on "Add test suite" button
Deleting a test suite
Find the test suite you want to delete and click "edit" icon
Click the "Delete test suite" button
When prompted with following message

Delete test suite – only test suite will be deleted. All tests will remain without a test suite reference
Delete with test cases – all tests that are in the test suite will also be deleted
Modifying a test suite
Find the test suite and click "edit"
Modify properties that need to be changed
Click "Save changes" button
Adding tags to a test suite
Locate the test suite where you want to change tags and click "edit "
Insert or delete tags from "Tags" field
Press "Save changes" button
Directories
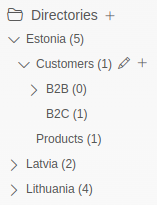
Each test suite can be assigned into a custom directory to create a directory-based structure for test suite management. Directories can be created by clicking on the plus sign on the sidebar after "Directories". To create or edit sub-directories, hover on a directory name and click the plus icon or pencil icon.

Adding test suites to directories
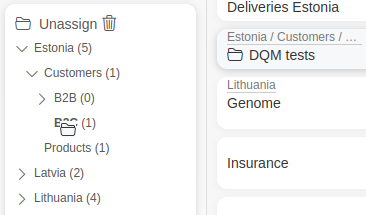
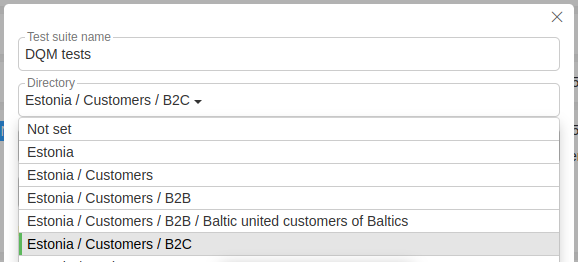
To add a test suite to a directory, hover on a test suite name. A directory icon will appear. Click and grab the icon and drag it to a directory. To remove a directory, drag it to "Unassign" section in the sidebar. Directories can also be changed by editing a test suite.


